
How do I stack and blend layers in Ps with Ps doing the work…. I don’t want to use masks I just want it to blend three shots (you can do more or less!)
When I would do this…
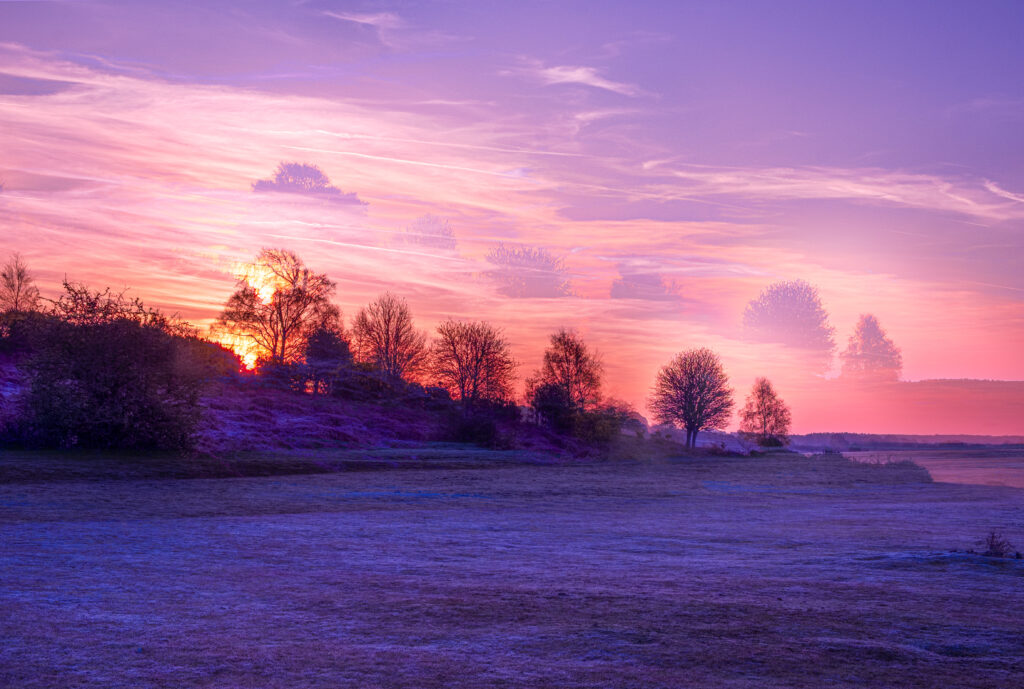
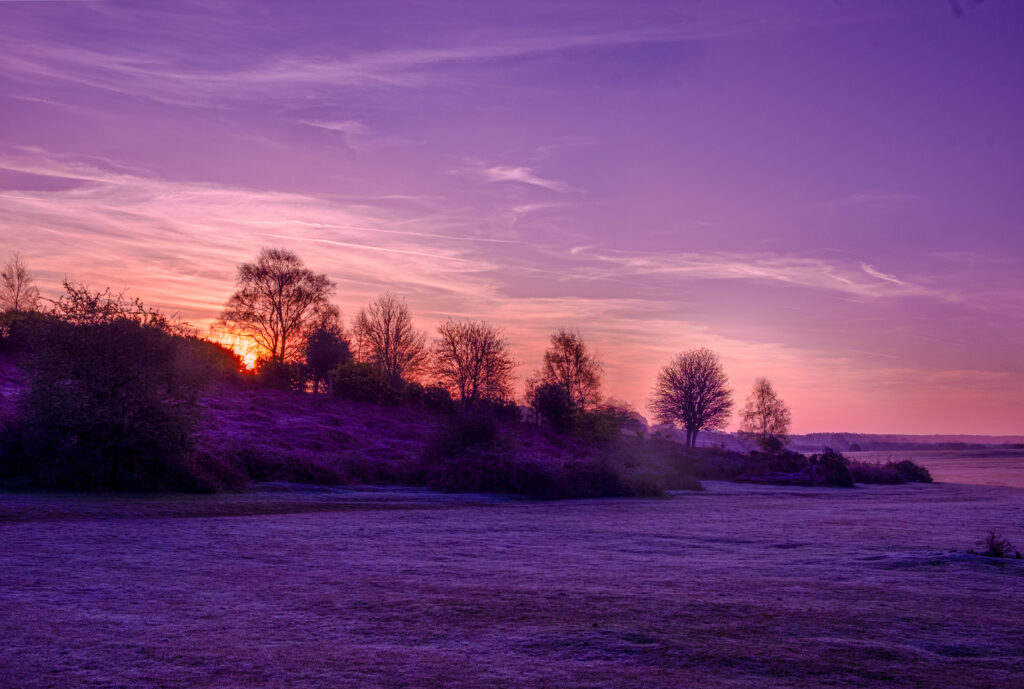
It was a beautiful morning this morning and I wanted to capture a line of trees in the sunrise – shooting straight into the rising sun. The problem was if I got the exposure ‘right’ for the trees, I burnt out the sky and the lovely frosty forest floor was still too dark. But if I exposed for the sun now the trees were nothing more than silhouettes…
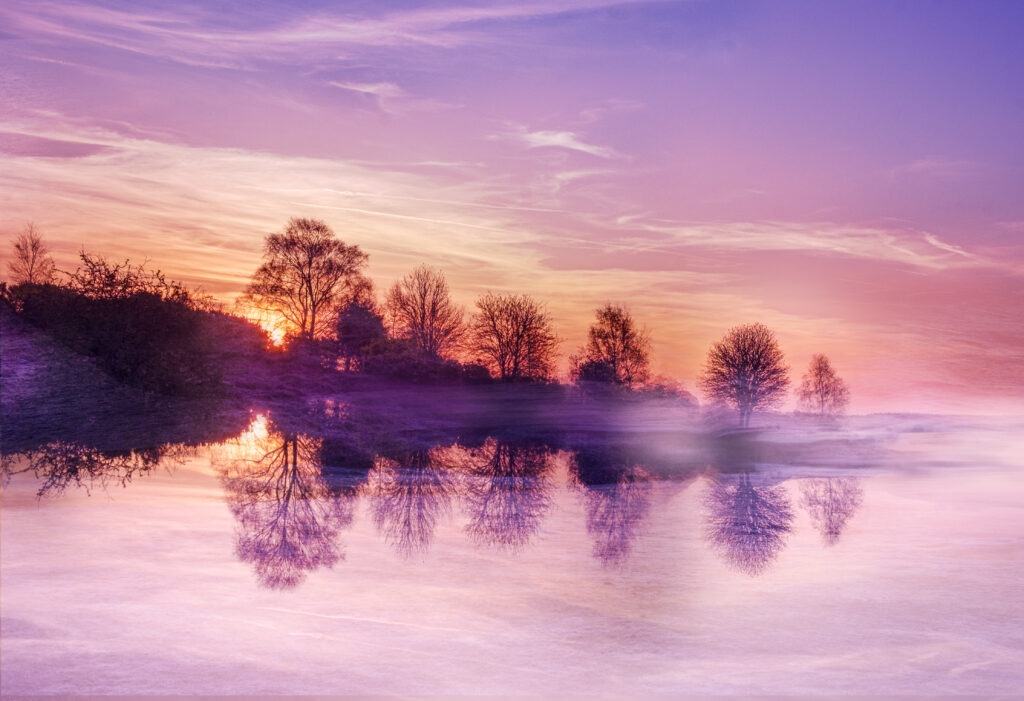
What I needed was three shots – one for the sun, one for the trees, one for the surrounding area… I had an idea that merged into this trio of shots afterwards….More about that in another tutorial… The first problem was getting a nice image to work with….
Photographers call it bracketing and most cameras will do it automatically (refer to your manual).
I don’t like the camera doing it automatically because I like to be in full control with my art head on – I’m thinking what else might be useful, shall I do an ICM in one shot etc…
So, I take three shots as close as I can to not moving because I’ve no tripod – I’m on the morning dog walk and have seen this beautiful ‘moment’… and I’m always grabbing moments that’s what this is all about for me…
I took three shots ‘straight’ ie no ICM in one shot capturing the sun without burning it out, another for trees (now ignoring the burnt-out sky and exposing to capture some detail) and a third for the sky and surrounding areas so I got more detail of the grass and frost… I then did an ICM just in case I wanted to use the movement for flow…
When you get home you can now get Ps to blend the three together to give you lovely exposure across the whole image…. This is when I’d use this technique called manual HDR (high dynamic range) exposure blending…This is how you do it in Photoshop…because they are not going to be perfectly aligned, I’m pretty steady holding the camera but there’s no way you can know exactly where you were holding it the first time… we’re humans after all…
Here’s the process
Open your layers in one file (if you don’t know how to do that check this tutorial out) (demo opening files in photoshop three ways)
Select all the layers (shift click)
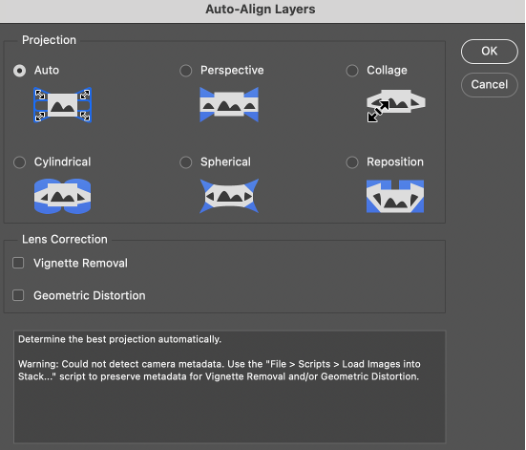
Edit- Auto Align Layers…you’ll get a dialog box that looks like this
Select Auto and Okay
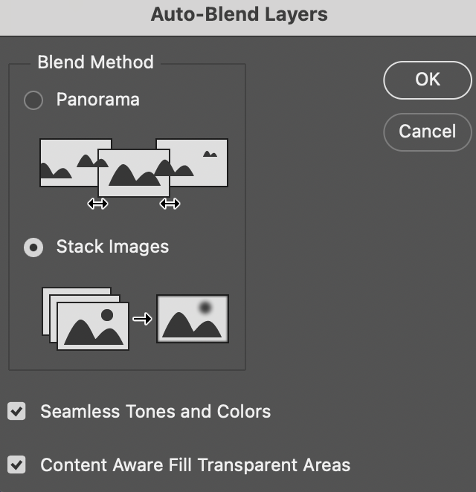
Now you need to blend the images so this time – Edit – Auto Blend Layers – Stack Images and click okay
Troubleshooting.. Not Working for You? Here are a few thoughts that might help…
Auto align layers or Auto blend layers are greyed out?
- Have you selected all the layers
- Are they all ‘visible” i.e the eyeball is turned on
- Do you have any of them as smart objects (you need to rasterise) right click rasterise the layer (NOTE you will lose all the your filter masks if you do this) I recommend duplicating the layer first so you’ve got a copy (Command/Control J to duplicate)
It doesn’t work there are bits all over the place?
- Check all the layers were turned on to 100% opacity and fill?
- Sometimes Ps does play up – save all the layers and, leave Ps and then come back in and try again…
Tips
Don’t forget you can Command/Control J to step back if it goes wrong
I also recommend duplicating all layers (in any work you’re doing) at the start and put all the originals in an originals folder so you’ve always got backup copies…”just in case”
