When I was asked how I edited this I nearly just wrote a list of my photoshop layers then I realised maybe its more important to think – why I did what I did…
When I look at the images at home I often have a video of the moment too so I can transport myself back to that place, especially if it’s an ICM. For me it’s all about feelings and sensations…
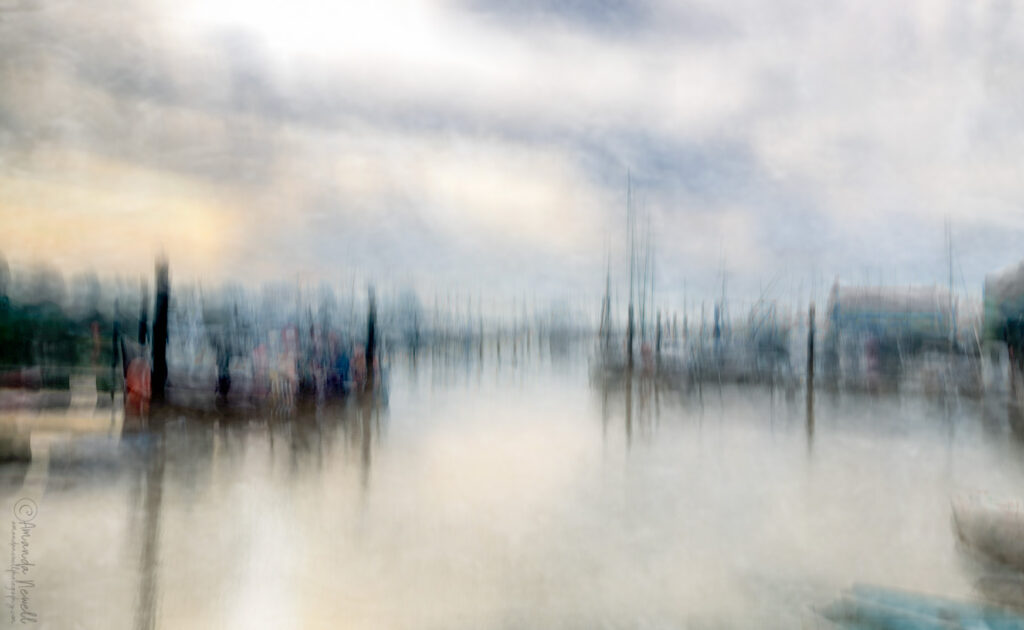
It was windy that morning, gusty, the sun going in and out in the last part of the mornings golden hour but with heavy cloud cover…
Anyway… I’ve made a short video to walk you through it and then the key points are below… Hope it helps 🙂
On the technical stuff…
Shooting It…
The image was shot at 64mm on a 2 second exposure… I was standing in the shadows with buildings all around me at the far end of the marina…
Movement for this – I’ve been experimenting with longer exposures so I can blend two movements – I was moving the camera forward ‘into the scene’ with a slight jiggle movement for part of the 2 seconds then pausing moving straight up and straight down to capture the masts in a (nearly) straight line… End of movement – it took a lot of goes to get it close to where I wanted it… (that’s the thing with ICM expect to have to tinker around a lot to get it right – it’s a dance between the time, space, camera and you)
Post Processing
Bearing in my mind my thoughts about the environment above…
Step One – Camera raw edit (on a smart object) I’m pretty sure I went back later and added the profile I wouldn’t have done that at the start….Adjusted the texture, clarity and dehaze to soften…
Step Two – Added a high pass filter to sharpen the already sharpen edges – that’s what the high pass does – the only snag with it on an ICM is where the water has got ‘pulled up’ with the upward movement it’s sharpened that too so I painted black on the layer mask to get rid of the sharpening to that bit I didn’t want that there in the first place and obviously it’s not true to life…
Step Three – Painted colour on a blank layer to add back some of the colour from the water that was lost in the ICM movement… Small amount of Gaussian blur 3.5pixels and a mask to make the edit minimal…
Step Four – Next layer is a texture (Fly Paper Textures Barbizon) I desaturated it completely so there was no colour from it only texture, it’s too strong so I’ve blurred it
Step Five – Next layer is a duplication of the texture layer. It was a very windy day, I was trying to get back that sense of the wind, the busyness of it… but without strong brush strokes so softened the texture then duplicating it worked best…
Step Six – Another layer of colour back on the water, I’d taken a video of the morning so I could refer back to how it looked – (that was a tip from Jack Lodge the landscape photographer) so you can take yourself back to the ‘moment…’ I used soft light blend mode and dropped the opacity to 54% on this layer.
Step Seven – Stamp layer (merge without flattening all the layers) with final camera raw edit where I pulled the shadows to get back some of the colours of the boats but then pushed the blacks to the sharp black colour where it should be… slight adjustment to soften the whole thing again on the texture and clarity – pulled to the left…
Step Eight I’ve then duplicated the texture a third time (exactly the same just a copy) and dragged up the top of the layer stack… 39% opacity and soft blend mode…it makes minimal difference, but I just felt I liked it on the clouds…
And that was my full edit…there’s no prescription for editing… for me it’s about trying to bring back feeling and sensation, the essence of the place and time…
Have fun 🙂